The Resident Evil 4 Remake has been a resounding success, selling millions of copies, garnering critical acclaim, and living up to its series’ standard, showing why Capcom’s flagship franchise is a heralded name in the world of survival horror. With the success of Resident Evil 4, gamers who hadn’t yet experienced the magic (and terror) of Resident Evil have begun flocking to the previous entries like the Resident Evil 2 and Resident Evil 3 remakes, which launched back in 2019 and 2020 respectively.
A next-gen upgrade for both titles launched in 2022 providing graphical updates, such as ray tracing and higher frame rates into the two games. For players interested in experiencing the Racoon City zombie outbreak, or reliving it with improved graphics, here is everything you need to know about enabling ray tracing in Resident Evil 2 and 3.
How to Turn On Ray Tracing in Resident Evil 2 and 3

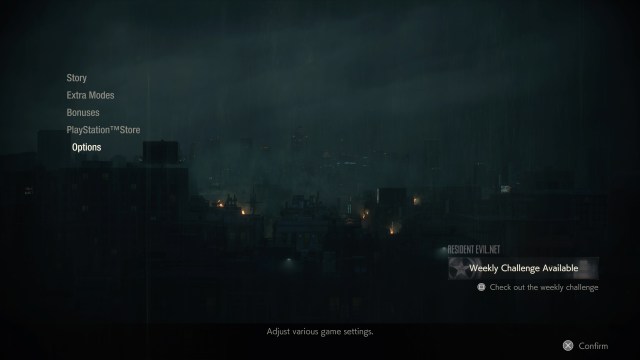
In order to enable ray tracing in Resident Evil 2 and 3, in the main menu locate the “options” tab and select it.
Related: Tips to Get an S+ Rank in Resident Evil 2 Next-Gen Remaster

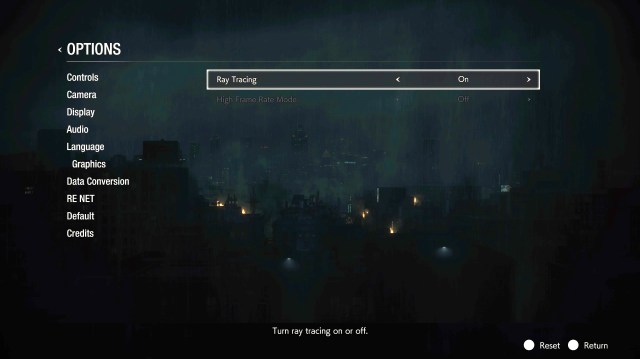
In the options menu there are a variety of selections including controls, camera, display, audio, language, graphics, data conversion, RE NET, default, and credits. Enabling ray tracing is found in the Graphics tab. There are two graphics options, including ray tracing and a high frame rate mode, we will focus on the former. In order to enable ray tracing, simply set ray tracing to “on” in the graphics options. Proceed to start, or continue your run through Resident Evil 2 or 3 as you encounter the iconic Tyrant, Nemesis, and the many other trademark horrors found in Resident Evil’s remakes.
Related: Resident Evil 2 Next-Gen Remaster: Every Gun Ranked and Where to Find Them
For more news, reviews, guides, and features on the Resident Evil franchise or the videogame industry in general, Prima Games has everything you need, just a click away.


Published: Apr 24, 2023 11:55 pm