

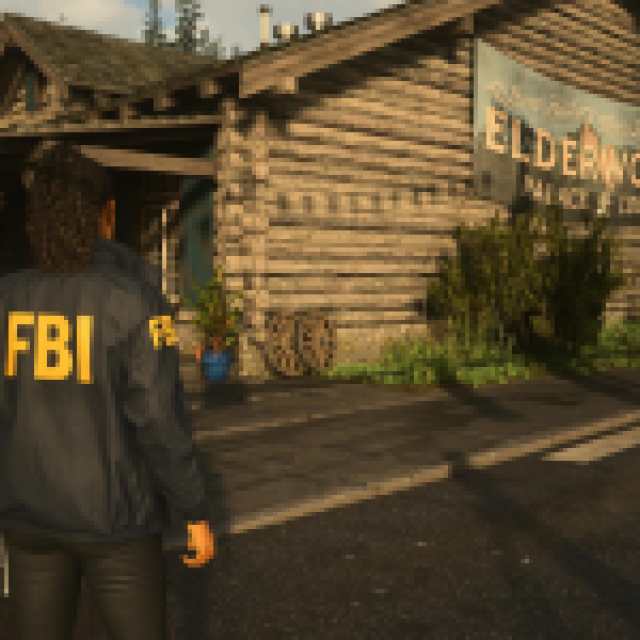
There’s no shortage of collectibles in Alan Wake 2, and here’s your guide to ensure you don’t miss a single one. Here’s how to find all the Return 1: Invitation Collectibles in Alan Wake 2.
All Collectible Locations in Return 1: Invitation in Alan Wake 2, Listed
I mean it when I say there are a lot of collectibles in Alan Wake 2. And you can start finding them as early as the first chapter of the game. I’ll list collectibles associated with trophies and collectibles that will net you some excellent bonuses and loot for Saga.
Return 1: Invitation has the following collectibles:
- Deer Heads – 3
- Lunch Boxes – 6
- Cult Stash – 1
- Koskela Brother Commerical – 3
- Maps – 3
That’s a grand total of 16 collectibles! I’ll be doing this in chronological order so you can follow this guide as you play through the chapter.
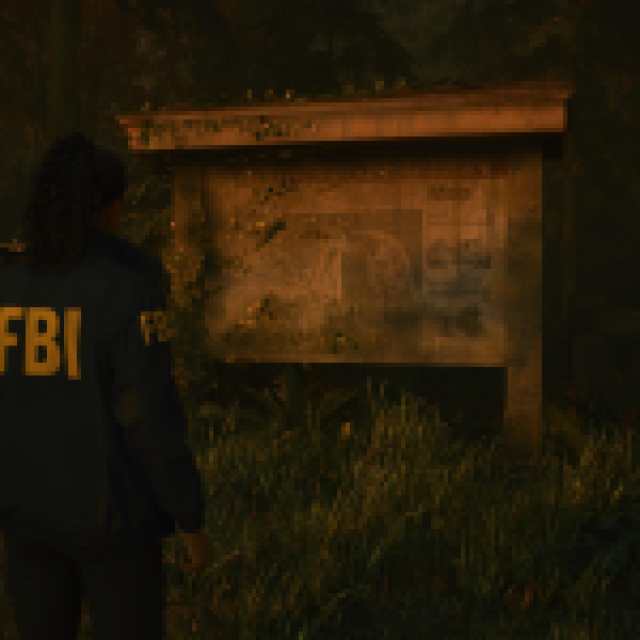
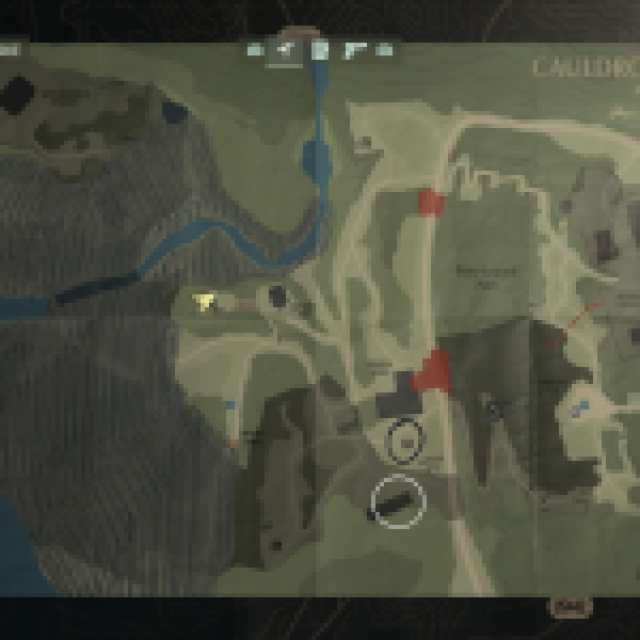
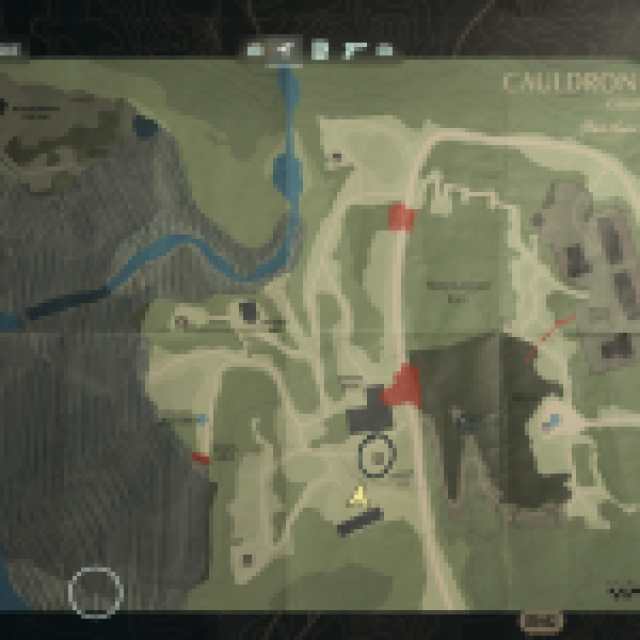
Collectible 1 – The Cauldron Lake Map (1/3)
You’ll get the Cauldron Lake map shortly after the cutscene when you arrive at the gravel parking lot. The tutorial will really push you to pick up this map. In fact, you may have no choice but to do so. This might be the most useful collectible of the chapter, so be sure you’ve added it to your collection.

Collectible 2 – Mortar Falls Lunch Box (1/6)
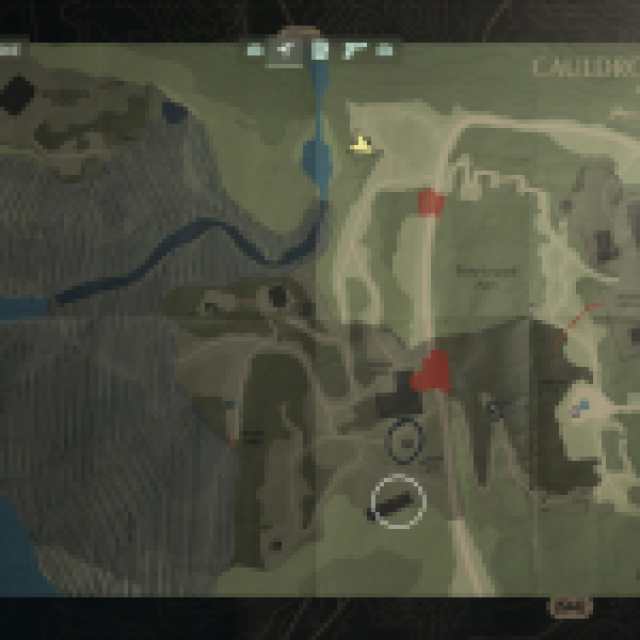

For the lunch boxes, I’ll be going counterclockwise to reduce how much backtracking we’ll need to do. After speaking to the police officer at the hole in the fence, follow Casey down the path towards the murder site. You’ll jump down a ledge where the stairs have broken. Continue down the path.
Casey will turn left, but don’t follow him. Instead, continue forward and take the second left.
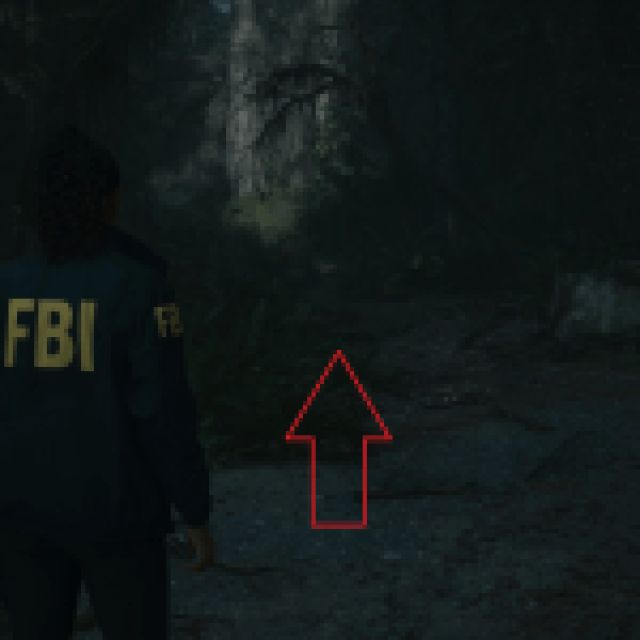

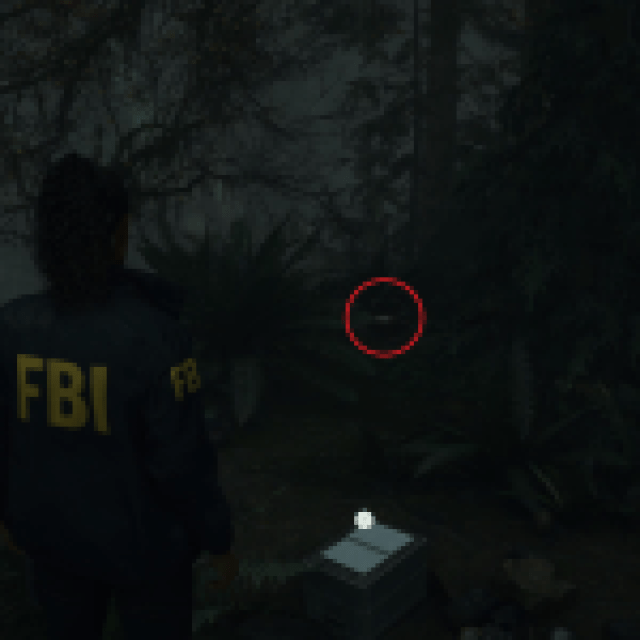
This will lead you to a dead end which has the Mortar Falls sign. To the left of this sign, hidden in the bushes, is our first Lunch Box.

Collectible 3 – Witch’s Hut Lunch Box (2/6)

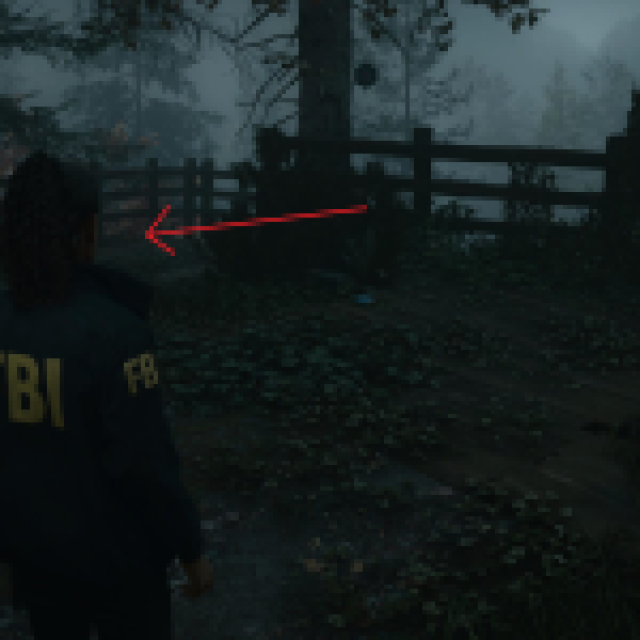
From Mortar Falls, follow the nearby trail. Keep right at the first fork, and then continue until you’ve hit a crossroads. Of course, a Witch’s Hut would be near the crossroads! Take the westmost path, and you should see the Witch’s Hut. We can’t do anything with this location yet, so continue past it until you find a natural bridge.

This bridge will lead to a lookout with some chairs and some trash. Stand in front of the chair and face forward as if you were sitting in it.
From this position, head straight, and you’ll find a lunchbox hidden in the bushes.
Collectible 4 – Abandoned Camp Site Lunch Box (3/6)

From the lookout, go back across the bridge and head south. You’ll hit an abandoned campsite. Find the firepit and go past it and the magazines to find the third lunch box.
Collectible 5 – Cult Stash (1/1)

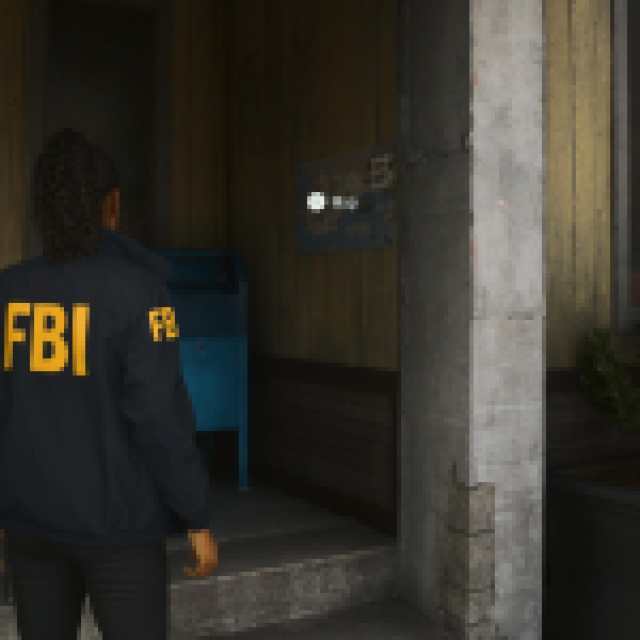
From the abandoned campsite, we’ll need to head towards the murder site. Take the eastmost trail from the abandoned campsite, and you’ll find yourself at the trailer.
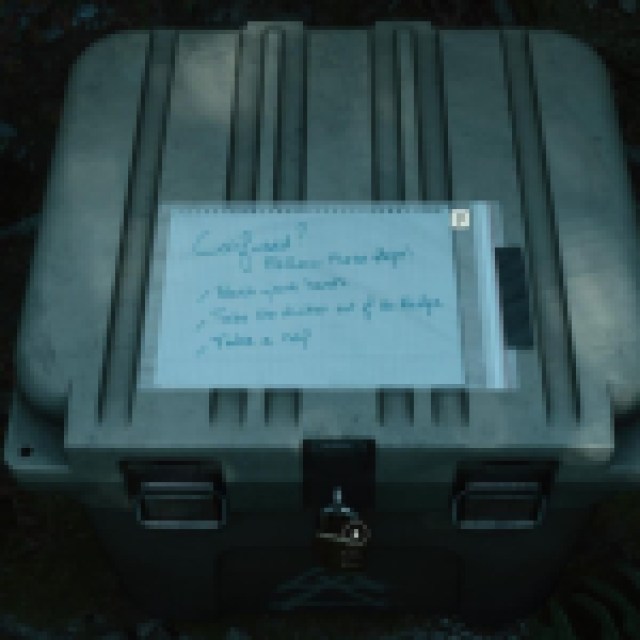

In front of the trailer, wedged between the tables, is the first Cult Stash. You’ll need to solve the puzzle taped to it to open it. Or you could just read our guide if you want the answer fast.
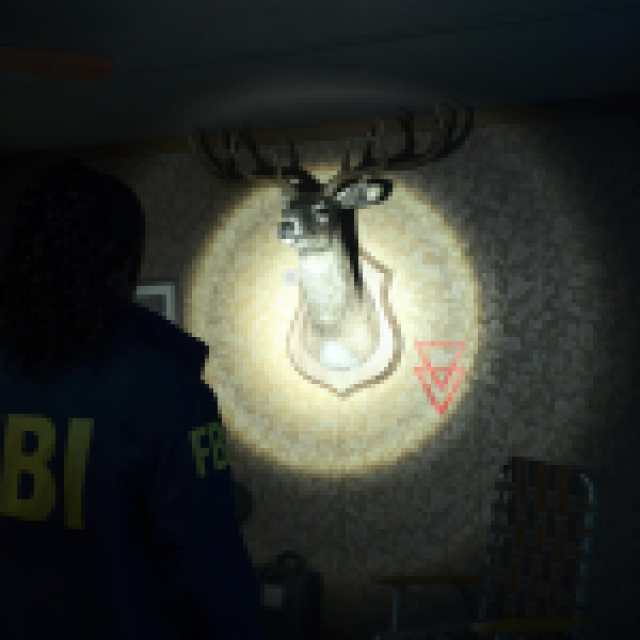
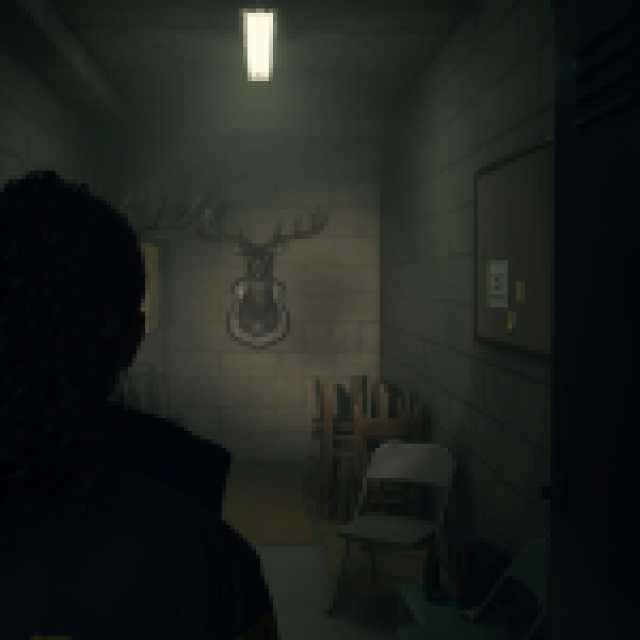
Collectible 6 – Cult Trailer Deer Head (1/3)
For our deer head, you’ll need to head inside the trailer. Immediately turn left and go into the room. There on the wall will be the deer head. You must interact with the deer head for it to be counted towards Saga’s total.
Collectible 7 – General Store Dead End Lunch Box (4/6)

Now that we’re done with the edges, we can head to the Murder Site. Once you get there, you can opt to ignore the investigation. They’ll wait for you.
Instead, go to the general store and position yourself in front of the sign. Beside this sign is a trail. Follow the trail north, and you’ll find a lunchbox at the dead end, slightly to the left.
Collectible 8 – FBC Lunch Box (5/6)
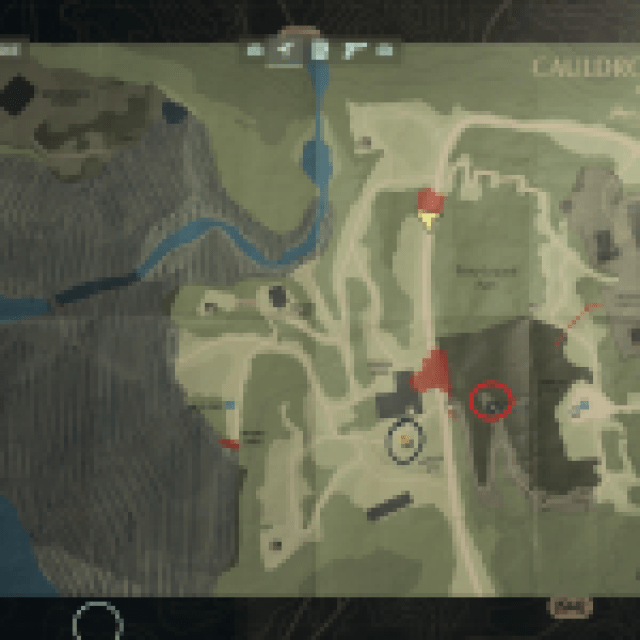

You’ll only be able to obtain this lunch box after you’ve completed your examination of the body and the police officer hands you the shortcut key. Once you have the shortcut key, head through the locked door in the fence just past the murder site and general store.
Casey will head straight there if you’re struggling to find it.
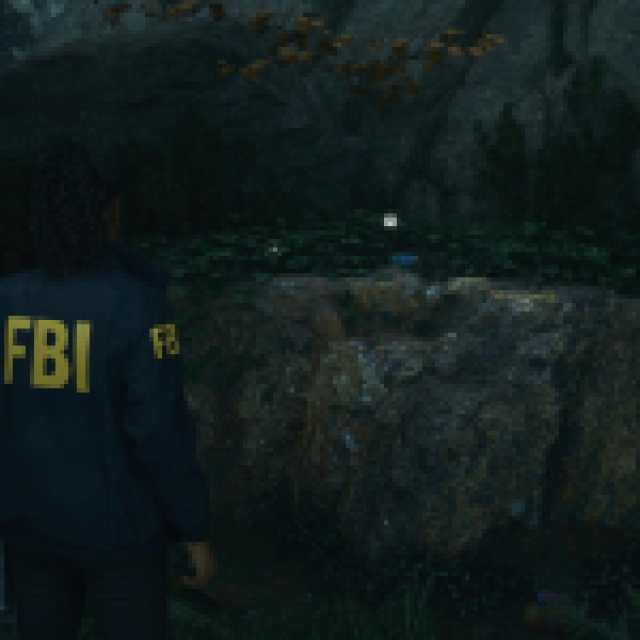

Follow the path up until you see a square grey building. This is the FBC Station. Go behind it, and you’ll see a rock outcropping you can climb. Do so to find the lunch box.
Collectible 9 – Koskela Brother’s Lodge Commercial (1/3)
You’ll be able to access this commercial after you get into the car and return to Bright Falls. Once you’re in Bright Falls, you’re free to roam around some of the town, including the Lodge. The lodge is the log building immediately to your left when you load in.

Supposedly, this commercial will play when you try to leave the building. The television is in the main entry room. It didn’t play for me. And if it doesn’t play for you, don’t sweat it. You’ll come into the lodge in later chapters, so you’ll have other opportunities to try and get it to trigger.
If the commercial does play, remember to interact with the television.
I suspect you can actually only get two Koskela Brothers Commercials in Chapter 1, but I’ve listed all three locations just in case.
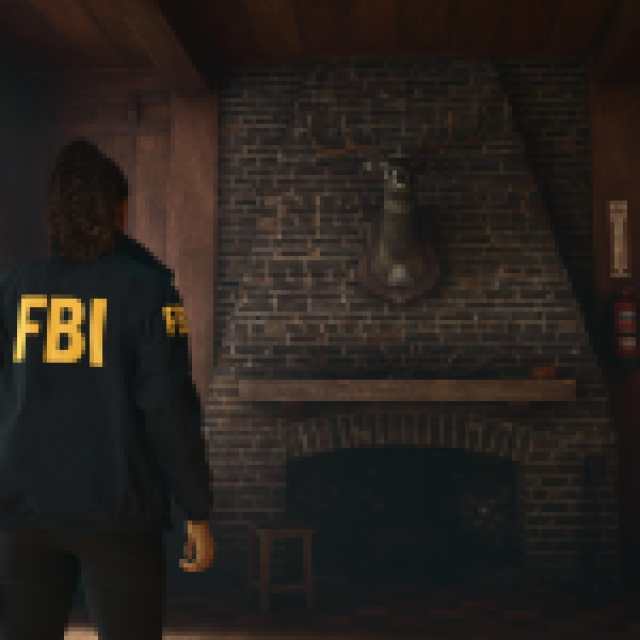
Collectible 10 – Lodge Deer Head
Once you enter the lodge, turn right and enter the dining room. Go to the back, then turn left at the bar.

You’ll find the deer on top of the fireplace immediately in front of you. Remember to pet it.

Collectible 11 – Bright Falls Map (2/3)
There are actually two locations for the Bright Falls map. But the closest option is on the left side (if you’re looking at the entrance straight on) of Oh Deer Diner. It will be outside of the diner, beside the telephone booth.
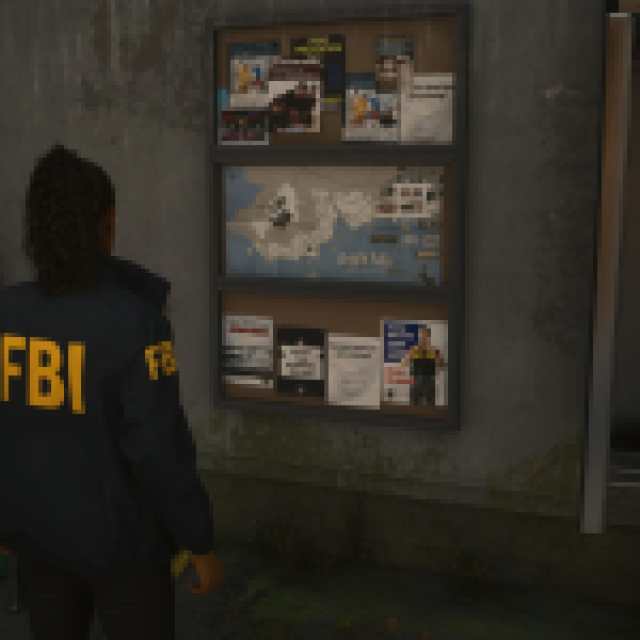

The second option is to grab the map on the outside of the sheriff’s office, to the right of the entrance.

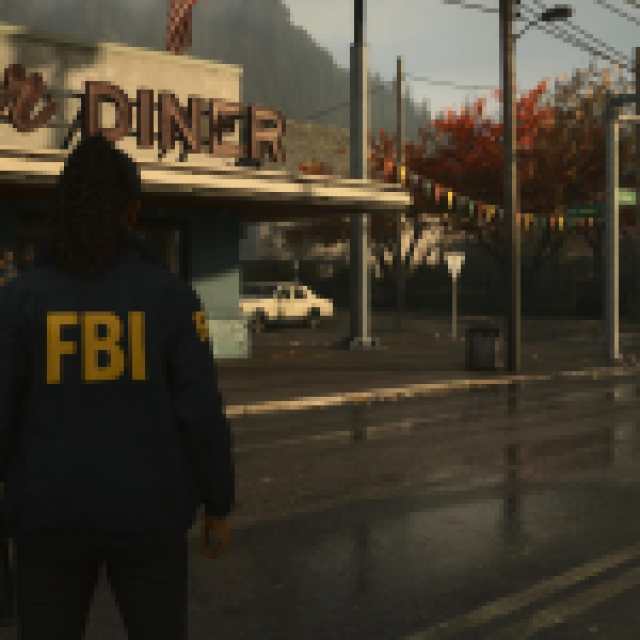
Collectible 12 – Oh Deer Diner Deer (2/3)
You’ll have to enter the diner for plot purposes. In the far back right, close to where you’ll find the witnesses, is a hall that leads to the bathroom.

Enter the hall but immediately turn right. You’ll find a door that will open into a supply closet. To the left will be the final deer.
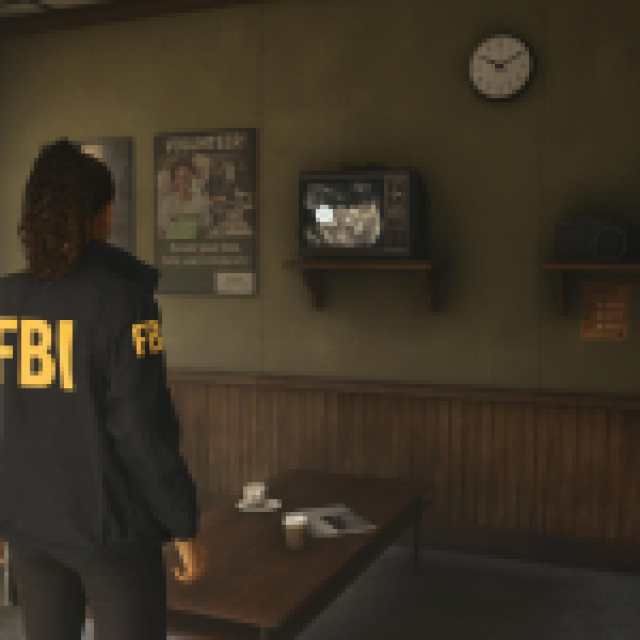
Collectible 13 – Koskela Brother’s Oh Deer Diner Commercial (3/3)
This commercial will play if you approach the television inside the Oh Deer Diner. The television is located on the left side wall, almost immediately after you enter. It’s close to the ceiling.
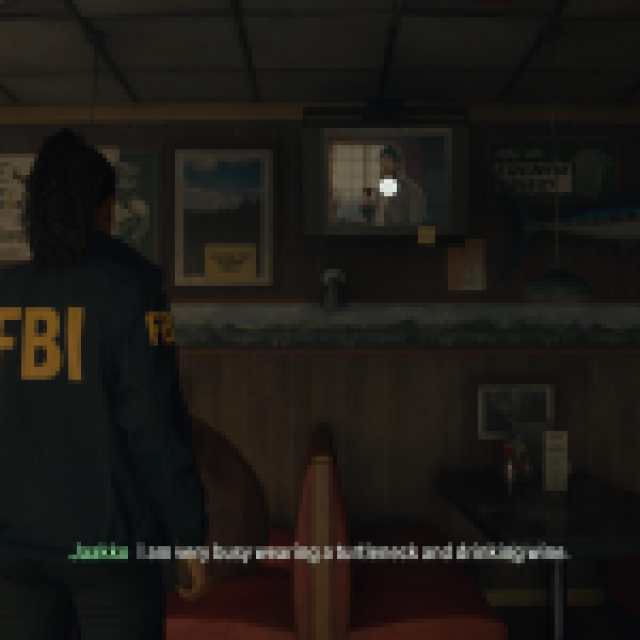

You may need to return to the Oh Deer Diner after speaking to the Bookers to trigger this commercial. It didn’t play for me until after I’d gone to the sheriff’s office and completed the inspection on Nightingale.
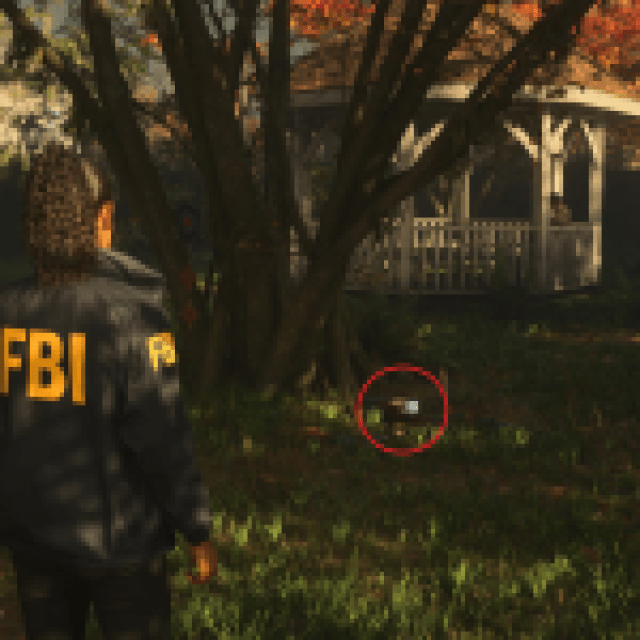
Collectible 14 – Bright Falls Park Lunch Box (6/6)
Across the road from Oh Deer Diner in Bright Falls is a park.

It’s quite small, and you should see a gazebo at the far end. Approach the gazebo, but before you get to it, head right.
Beneath a tree to the right of the gazebo’s entrance is the final lunch box.

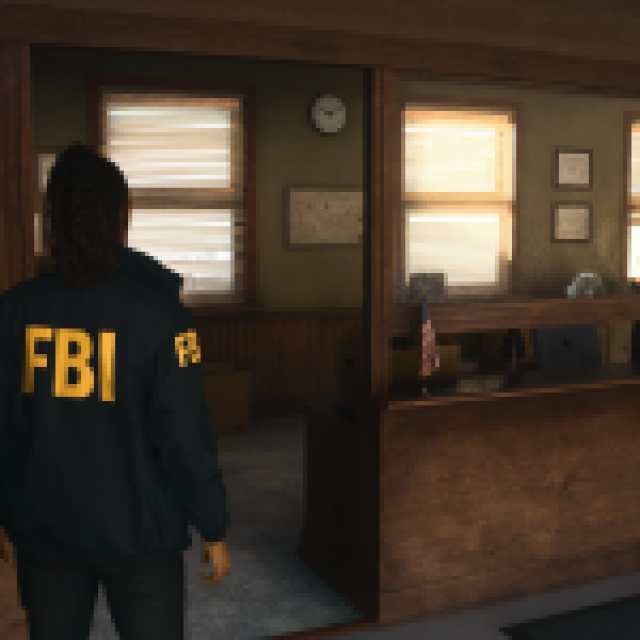
Collectible 15 – Sheriff’s Office Map (3/3)
After you enter the sheriff’s office, you should see a front desk in front of you. You can enter this partitioned room and grab the map that’s hung against the wall. It’s the color of old parchment, slightly beige-yellow.

Collectible 16 – Koskela Brother’s Sheriff’s Office Commercial (3/3)
This is one of the few missable collectibles in the game! So, be sure to get it now or during Saga’s Return 3: Lost Girl chapter. After that point, you’ll never be able to trigger it again.
After entering the sheriff’s office, turn left. If you’re following the chapter plot and are here to examine the body, you should see Casey standing at the far end of the hall. Go into the second door on the left.
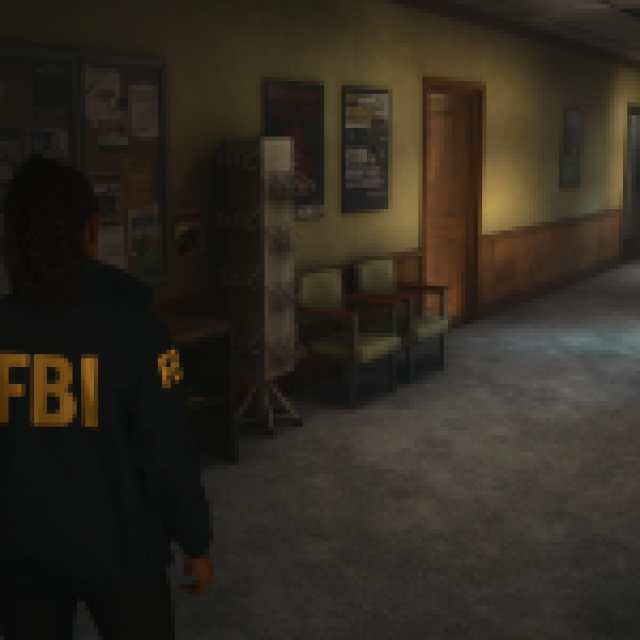

Approach the television on the right wall. A Koskela Brothers commercial should start playing.

Interact with it, and you’ll have it added permanently to your collection.