

Tired of teamkilling everyone with mortar strikes? How about reducing the height of your team by approximately half with a Gatling sentry? Let’s look at how to effectively (and safely) use the two types of turrets in Helldivers 2.
How to Stop Teamkilling With Mortar Sentries
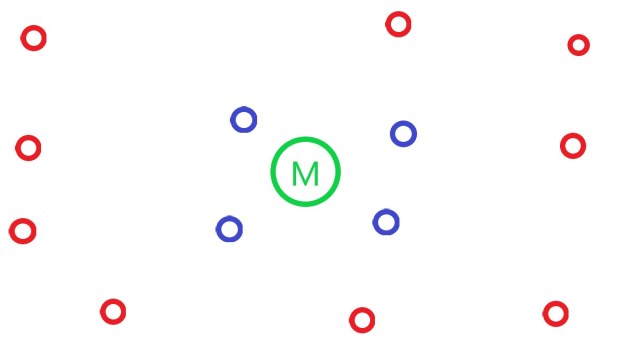
The mortar sentry is best to be used as a defensive tool. What you don’t want to be doing is dropping a mortar outside an enemy base and then running in guns blazing – this will guarantee you’ll be not only contending with enemy fire but also your own. It’s okay to set up a mortar as a preliminary attack but be sure to destroy the sentry if you’re advancing into its fire zone.
Below is the most reliable way to set up a mortar sentry to maximize its usefulness and minimize casualties. Keep your team close to the sentry, and far away from enemies. If you do find yourself near an enemy, get away from them and also get away from where they have been recently. The mortar sentry has a delay in its targeting, so you’ve got to do the extra mental work to plot a safe trajectory if you’re weaving between enemies.
How to Stop Teamkilling With Other Sentries
Now that we’ve tackled the outlier, let’s take a look at “direct fire” sentries. With these sentry types, we can actually see where they’re aiming, making them slightly easier to avoid. If you find yourself completely out of position, go prone – you’ll safely duck under any turret’s firing line. Otherwise, check out the chart below:
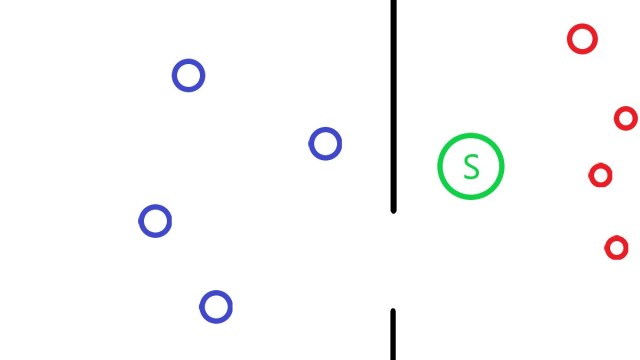
Placing an obstacle between you and the turret that still gives you a sight-line to the enemy is the most effective strategy when using sentries. If no cover is available, placing the sentry roughly between you and the enemy can be effective, but make sure you aren’t at risk of being flanked. Some sentries, like the autocannon, should be placed farther from the enemy so it has time to target and fire before being swarmed. Gatling sentries, conversely, should be placed closer. Below are the recommended positions for each type of sentry:
- Autocannon sentry: far from enemy, closer to team
- Missile sentry: medium-far from enemy, watch for backblast
- Machine gun sentry: medium-close to enemy
- Gatling sentry: medium-close to enemy
When used properly, sentries can be just as valuable as teammates. Now get out there and show these automatons that higher thinking is unnecessary when you have enough guns.